Introduction To Masking In ON1
If you are trying ON1 Photo RAW, the ON1 plug-ins like ON1 Effects or ON1 HDR, or upgrading your ON1 software to a newer version, please consider using my affiliate link. There is no extra cost to you and it helps support ON1 tutorials like this one. Ready to buy? Use the offer code SDP20 at checkout and SAVE 20%!
This is part of a mini-series about the masking features in ON1 Photo RAW and ON1 Effects. This article presents an overview of masking, where you can use masks in ON1, and common controls and features for all masks.
What Is A Mask? Why Do I Care About Masks?
A mask hides or reveals the impact of a filter or adjustment on your photo, or obscures or displays a portion of a layer. Masking is a simple concept that empowers complex photo edits. Masks can be simple shapes or basic brush strokes. They can also be intricate and nuanced, targeting specific tonal or color ranges in your image.
Ok … I got that, Scott … but why do I care? Well … the key to crafting a strong visual story is selective adjustments that accentuate the subject of your photo. Targeted application of effects filters and local adjustments guide your viewer’s eye through your photo. Masking is a fundamental skill to achieve this. It is a crucial skill to develop to take your post-processing to the next level.
A mantra to help you work with masks is this: “Black conceals, white reveals.” This phrase stems from how digital tools present masks. In grayscale terms, a black portion of a mask completely hides the filter, adjustment, or layer involved. Conversely, white reveals the full impact of a filter or adjustment. A silly, cheesy way to help remember this is to think of a superhero, like Zorro or Batman. The black mask on their face conceals their identity and the cutouts reveal the whites of their eyes (most, but not all, superheroes need to see).
A Color Enhancer filter adds a strong blue color grading to a photo. Portions of the filter are masked at varying strengths..
The mask for the Color Enhancer filter shows varying strength of the brush strokes. White areas of the (100%) mask reveal the full impact of the fitter. Gray areas (50%, 25%) allow for partial impact. Black areas (0%, the outer boundary) completely obscure the filter’s effect.
What Can I Mask In ON1?
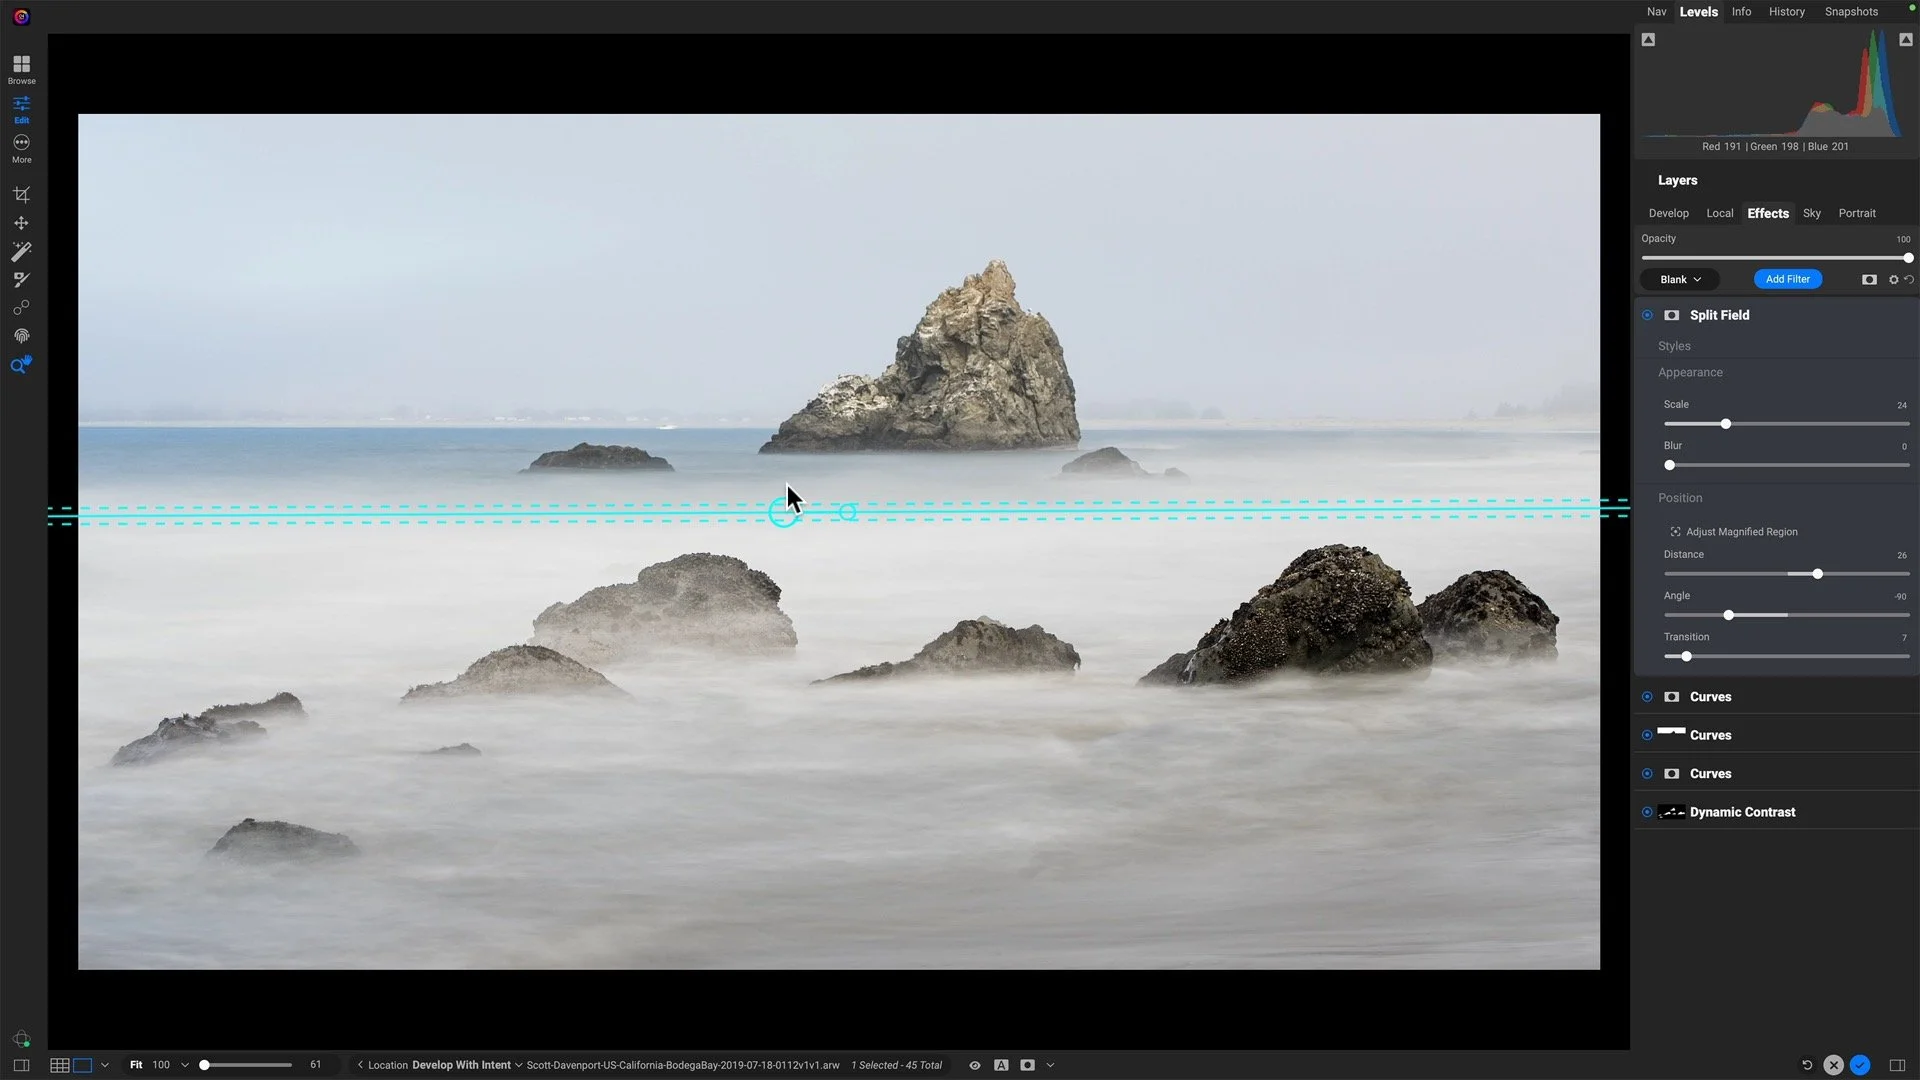
Masking is extensively supported in ON1’s photo editing tools. In brief, if you see a small masking icon (a gray rectangle with a black circle in it) next to something, that means it can be masked. In ON1 Effects, you can mask:
Individual filters in Effects
The entire filter stack
Individual Local Adjustments
Layers in a multi-layer photo
In addition, for ON1 Photo RAW users, masking is also used in:
Individual faces in Portrait
Sky Swap AI
Photo RAW can auto-detect and generate masks for portraits and skies.
Common Masking Controls In The Masking Options
Clicking a masking icon (the gray rectangle with a black circle in it, next to a filter, adjustment or layer) opens the Masking Options. The top half of these controls apply to any mask, no matter what tools have been used to create the mask. There are six button for common masking tasks. They are:
Invert: Swap the tones of the mask. Concealed areas are revealed, and vice versa.
Reset: Make the mask 100% white, revealing the entirety of the filter, adjustment, or layer
Copy: Copy the mask
Lumen: Create a luminosity mask
View: Visualize the mask with an overlay
Paste: Paste a copied mask
Copy, Paste, and Invert are very useful. A common technique to strengthen the story of your photo is to treat your subject with one filter or adjustment and treat the rest of the photo with something else. After building a mask for your subject, you can copy the mask, paste the mask to another filter or adjustment, and then invert it. Lumen creates a special kind of mask, a luminosity mask. That’s a topic for a different article.
Pro tip: You can copy and paste masks among filters, adjustments, and layers. If it can be masked, you can copy and paste.
The Density slider makes dark parts of the mask lighter, revealing more of the impact of a filter or the pixels in a layer. Notice how the outer boundary in this example moves from pure black to charcoal gray as Density is decreased.
The Feather slider softens the edges of the mask. The slider in the Masking Options affects the entire mask. It is distinct and separate from feather controls for individual masking tools.
Viewing Masks
ON1 has two viewing modes for masks, grayscale and a red overlay. The mode is set in the Mask > View Mode menu. Both modes have their place. The red overlay is helpful when you need to create a mask but also see your photo as you build the mask. Grayscale is helpful to fine tune the mask. Grayscale is easier to see the nuance in partial strengths of masks, or when the color tones of your image are similar to the red overlay.
The View button in the masking options area toggles off and on the masking overlay. You can also use the keyboard shortcut O (O for Overlay). I also recommend setting custom keyboard shortcuts to switch between the view modes. You can do this in the Edit > Keyboard Shortcuts popup. On my Mac, I set the grayscale mode to be Option-O and the red overlay to be Control-Option-O. You can set the shortcuts to anything you like.
Saving Masks In Presets
A final common thing you can do with masks is save them as part of presets. Presets are great to jumpstart your editing sessions and presets support masks. In the Settings > Save Preset popup, expand areas like Effect or Local Adjustments and select the Apply Masks option. When used judiciously, including masks in presets can make for very powerful one-click treatments for your photos.
Although masks can be saved in presets, not all masks make sense to include in presets. Masks that are “generic” like a gradient affecting the upper part of an image (ex: to darken a sky) or are built from the tonal or color ranges in the photo itself are good candidates to include in preset. However, masks that are tailored to specific elements or objects in your photo (a person, a building, etc.) are not useful in presets.
Up Next
The next article in the series will explain the various masking tool groups used to create and refine masks.
