Apply Two Curves In Lightroom!
The Curves tool offers incredible precision control over the tones in your image. Lightroom has both a traditional Point Curve and a Parametric Curve. Did you know you can apply both curves adjustments to your photos? Yes, you can use these two curves with different curve shapes and refine the tonality of your image. I like to use this technique with my black and whites, especially when pushing toward a high key type of look.
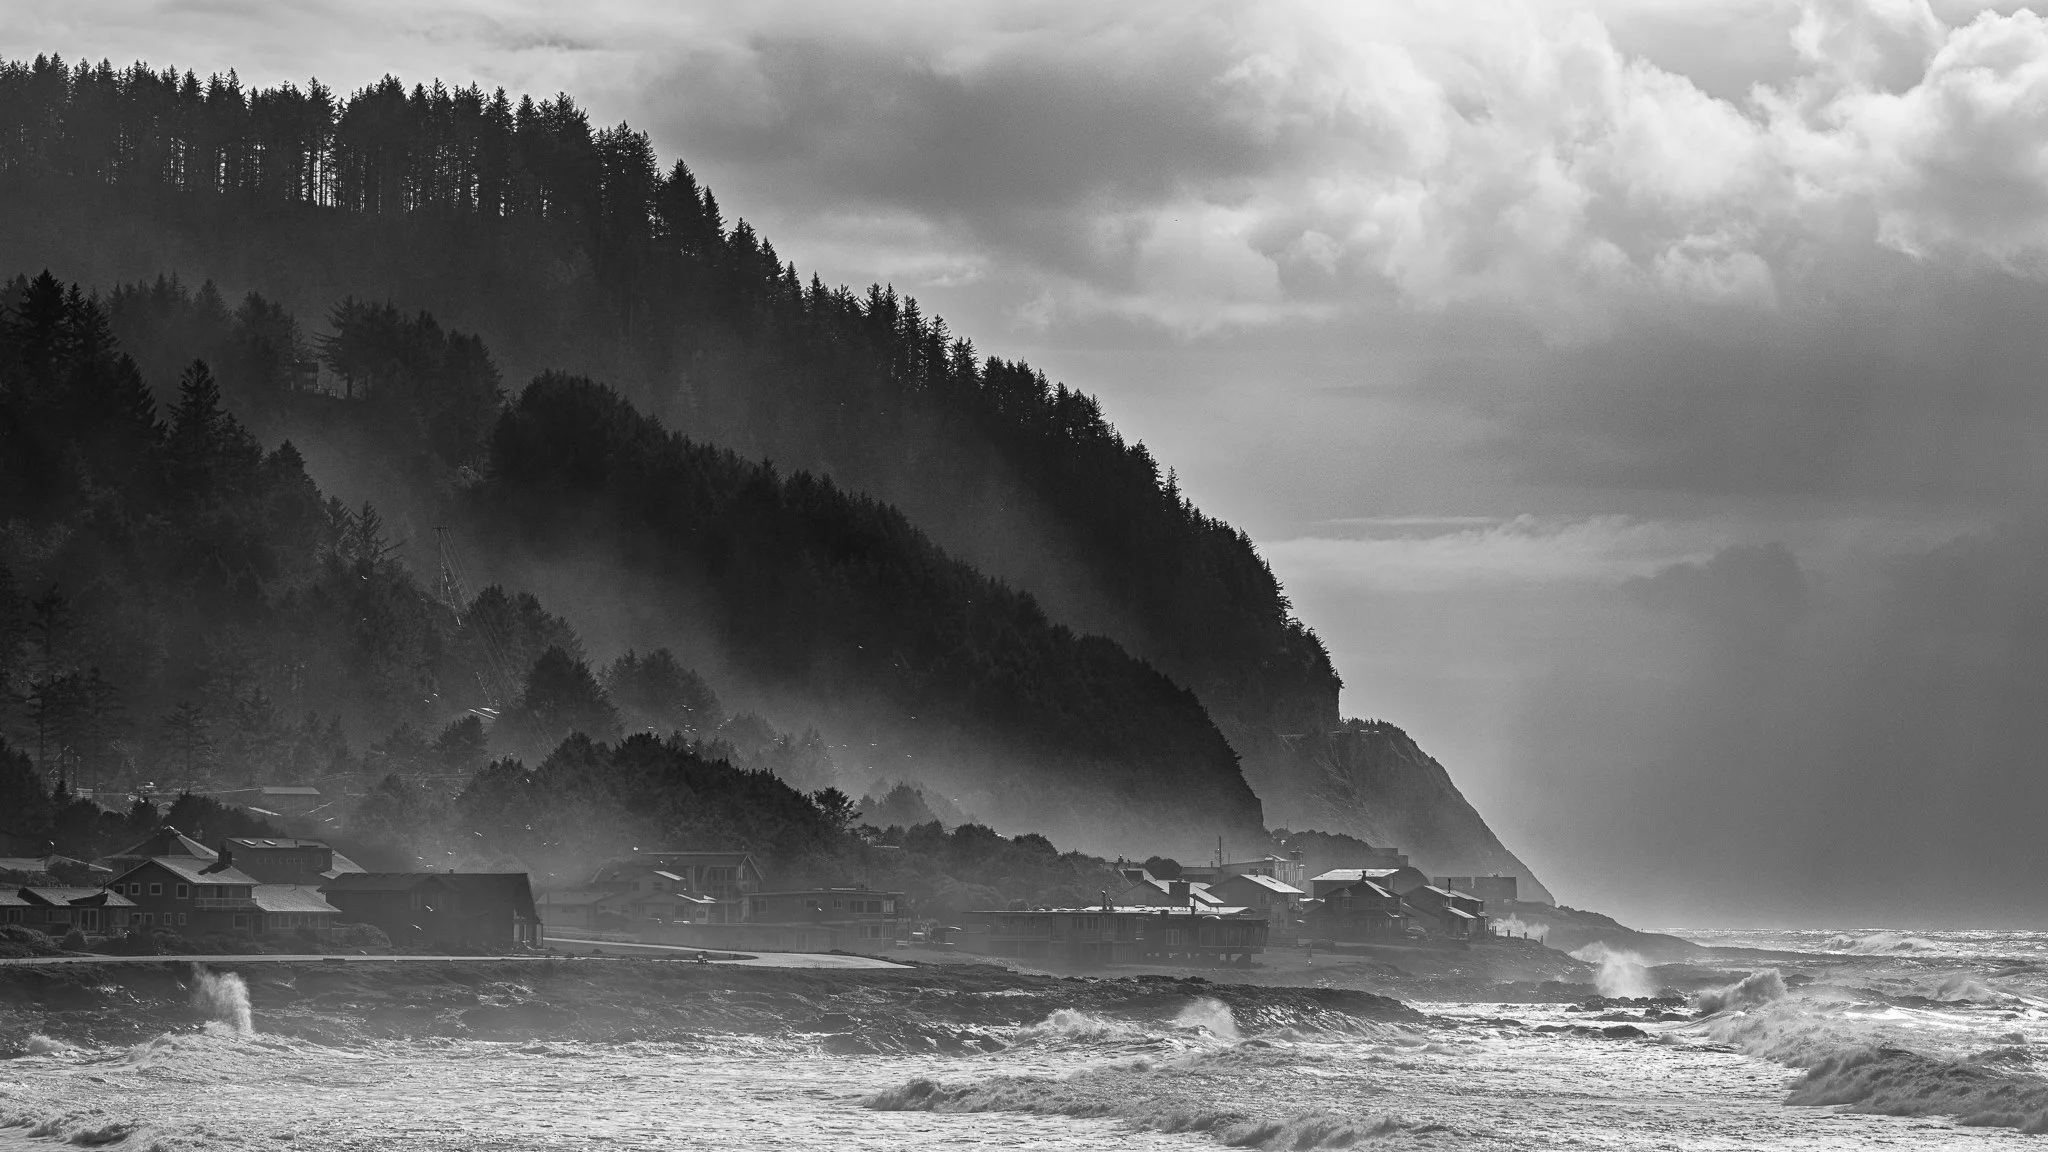
I will leverage the flexibility of applying two curves with my black and white work. In this example, I wanted the middle gray fog to be pushed much brighter, approaching a higher key type of photo. I used the point curve to redefine the black and white points and push the upper midtones much brighter.
Adjustments in the Basic panel
Using the tone curve to refine black & white point and the tonality
I still wanted a little more brightness in the upper midtones and highlights area. However, adding another adjustment control on the point curve without affecting the tones I’d already established was proving difficult.
I switched to the parametric curve and used its controls to change the transition points between shadows, darks, lights, and highlights. Then nudged the sliders for an ever-so-gentle S-curve that adjusted brightness in the upper midtones and highlights. It was just the nudge I needed.

A subtle refinement to the upper midtones with the parametric curve.
This is definitely a subtle touch - and sometimes that’s what a photo needs. When you need just that little extra nudge on a curve without affecting a main curves adjustments you’ve done, don’t forget you have a second curve available to you!
A Path In Fog
Contact Scott to commission a print or license this image.